 blog
blog
Professional Paver Sealing Benefits: What to Expect in 2026
Table of Contents
- Why Professional Paver Sealing Benefits Matter in 2026
- Enhanced Color, UV Protection, and Curb Appeal
- Stain Resistance, Weed Control, and Joint Sand Stabilization
- How Often to Seal Pavers for Lasting Protection
- DIY vs Professional Paver Sealing: Which Is Worth It?
- Paver Sealing Cost Per Square Foot in 2026: What Drives the Price
- Environmental Impact, Maintenance Schedules, and ROI
- Frequently Asked Questions
Last Updated: September 12, 2026
Why Professional Paver Sealing Benefits Matter in 2026
Professional paver sealing benefits start with protection: a sealer forms a barrier that slows UV fading, blocks stains, and stabilizes joint sand so pavers stay level and tight. This guide from Steve's Premium Pressure Washing breaks down what sealing actually does, how often to reseal, and where the money goes.
There's a catch most homeowners never hear about. Sealers are not permanent, and the wrong product on the wrong surface causes more problems than it solves. Below, we'll show you exactly how to tell whether your pavers need sealing, which finish suits your property, and how to avoid the mistakes that turn a restoration into a redo.
Enhanced Color, UV Protection, and Curb Appeal
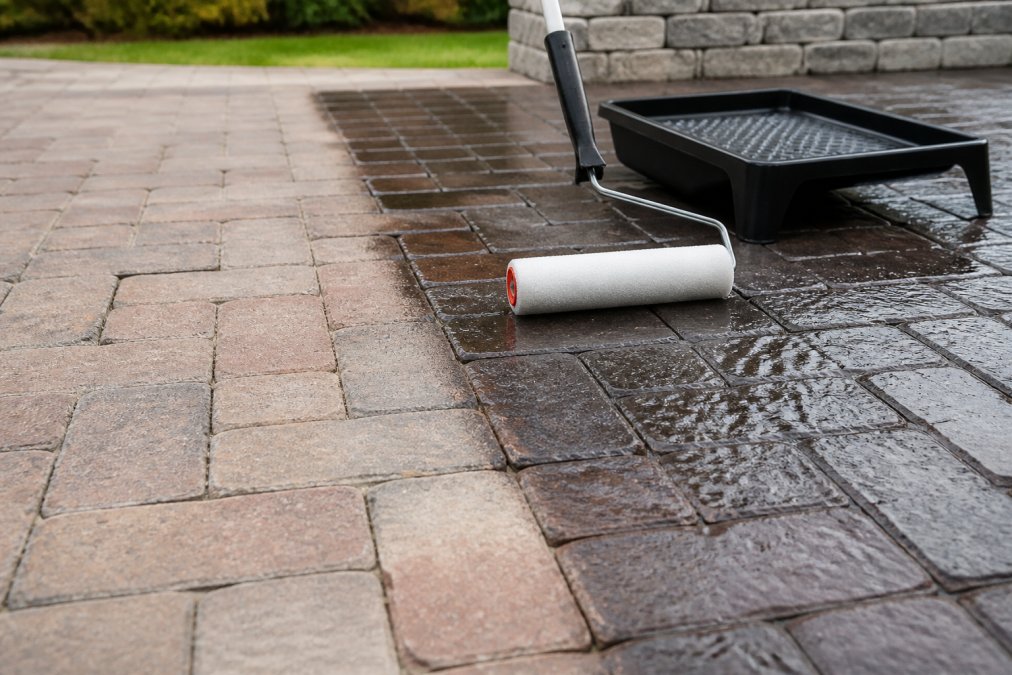
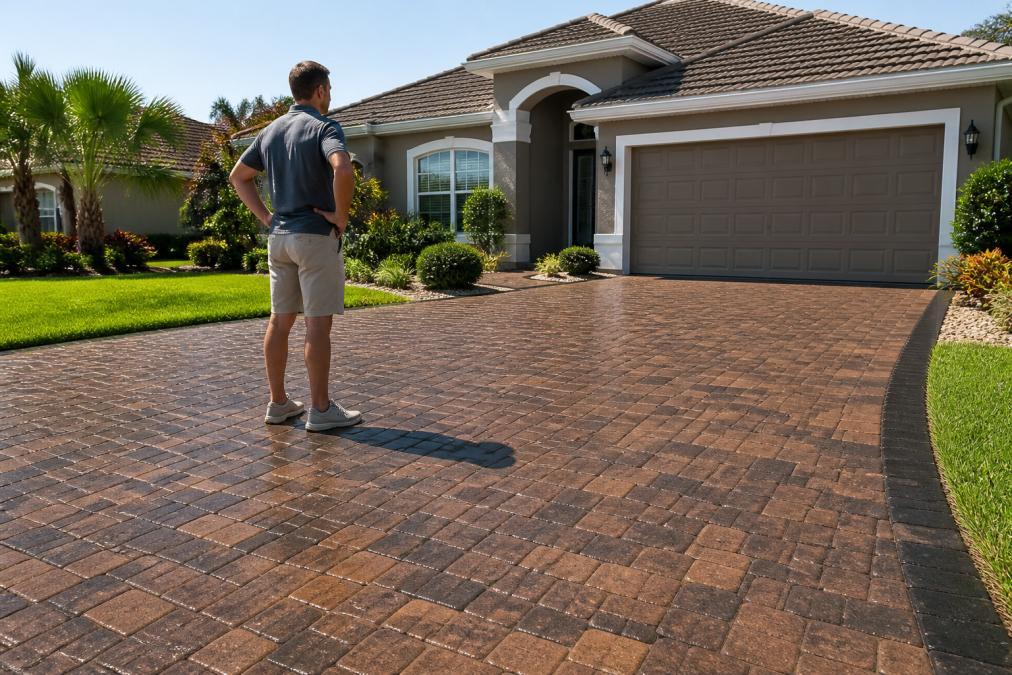
Sealing deepens paver color and slows the sun damage that dulls it. A quality sealer locks in the surface tone, so a driveway that looked washed out reads rich and even again.
Two finish options dominate:
- Wet look finish: darkens the stone and adds a gloss. Best for pool decks and entertainment areas.
- Matte finish: keeps the natural tone with no shine. Best for driveways and walkways where glare is a nuisance.
UV degradation is the quiet killer here. Constant sun exposure breaks down pigments and leaves concrete and clay pavers looking chalky. A sealer with UV inhibitors slows that process, which is why color enhancement and sun protection are really the same conversation.
Stain Resistance, Weed Control, and Joint Sand Stabilization
A sealer creates a hydrophobic barrier that keeps oil, grease, and rust from soaking into the surface. Spills bead up instead of staining, which turns a scrubbing job into a quick wipe.
The bigger structural win is joint sand stabilization. Polymeric sand sits between pavers and holds them in place. Without a sealer, rain and wind erode that sand, joints open, and pavers shift. Sealing locks the sand in, and that single step prevents most of the weed growth that plagues unsealed hardscapes.
Weed prevention works the same way. Seeds need gaps and moisture to sprout. A sealed, sand-stabilized joint offers neither, so you spend less time pulling weeds and more time enjoying the patio.
Mold and mildew deserve their own mention in humid climates. Sealed surfaces dry faster and stay less porous, which makes it harder for mold proliferation to take hold. It won't replace cleaning, but it slows the cycle.
One honest limitation: a film-forming sealer can trap moisture if it's applied over a damp surface. That's why prep matters more than the product itself.
How Often to Seal Pavers for Lasting Protection
Most pavers need resealing every two to three years, but that range is a starting point, not a rule. The real interval depends on three variables: sealer chemistry, sun and traffic load, and how well the surface was prepped before the last coat.
Sealer chemistry sets the ceiling. Penetrating sealers (siloxane- and silane-based) soak into the paver and react below the surface, so they don't build a film that can peel. Most practitioners find they hold three to five years on a shaded walkway and two to three on a sun-blasted driveway. Film-forming sealers (acrylic and polyurethane) sit on top of the paver and give you the wet-look gloss, but UV and foot traffic wear the film down faster, expect one to three years, with high-traffic driveways landing at the short end.
Sun and traffic set the floor. A south-facing driveway in full sun with two cars on it daily will chew through a film-forming sealer in roughly 18 months. The same product on a covered patio with light use can stretch past three years. That's not a sales pitch, it's UV oxidation and abrasion working on the film at different rates.
Watch for these signals that it's time to reseal:
- Water stops beading and starts soaking in within seconds
- Color looks faded compared to a few years ago
- Joint sand is washing out or joints look wide
- Weeds are returning in areas that stayed clean before
- The surface feels chalky or leaves a powder on your hand
The water test, done properly. Pour a cup of water on the pavers in three spots, full sun, shade, and the highest-traffic lane. If it beads and rolls in all three, the sealer is holding. If it darkens the surface and disappears in any spot, that zone is ready. Uneven results are normal; sealers wear unevenly, and a spot reseal on the worn zone is often enough to buy another year.
What actually shortens sealer life. The most common cause of premature failure isn't the product, it's moisture trapped under the last coat. If the pavers weren't fully dry (often 24 to 48 hours after washing, longer in humid conditions), the sealer cures over a damp substrate and fails from the bottom up. Deicing salt, fertilizer runoff, and pressure washing with too much pressure all accelerate wear too. A sealer applied over a dirty or efflorescent surface will fail in months regardless of how good the product is.
A realistic reseal calendar. For a typical residential driveway with a film-forming sealer, plan on inspection at 12 months, a spot recoat at 18 to 24 months if wear is uneven, and a full reseal at 24 to 36 months. Penetrating sealers push those numbers out by roughly a year. The point isn't the exact month, it's that you're checking on a schedule instead of waiting for the surface to look bad, because by the time it looks bad, the joint sand is already gone.
DIY vs Professional Paver Sealing: Which Is Worth It?
DIY paver sealing saves on labor but rarely saves money once you account for prep, product, and the cost of a failed coat. The job lives or dies on surface preparation, and that's the step most homeowners underestimate, and the step that determines whether the sealer lasts three years or three months.
Here's what professional application actually involves, and why each step matters:
- Pressure washing to strip dirt, mold, and old sealer. Not just a rinse, old acrylic sealer has to come off or the new coat won't bond. This is where most DIY jobs fail before they start.
- Treating efflorescence and stains before sealing. Efflorescence is mineral salt pushed to the surface by moisture (cement.org). Seal over it and you trap it under a film, where it turns into a white haze you can't clean off.
- Letting the surface dry completely, often 24 to 48 hours. Moisture under a film-forming sealer is the single most common cause of peeling and cloudiness.
- Applying sealer in even coats with the right equipment. A commercial sprayer plus a back-roll with a roller or squeegee gives a uniform film. A garden pump sprayer leaves lap marks and thin spots that wear through first.
- Managing temperature and humidity during cure time. Most sealers want surface temps above 50°F and no rain for 24 to 48 hours (extension.umn.edu). Miss that window and the coat never cures properly.
Skip any step and the sealer fails early. Too much moisture underneath, and it peels. Too little product, and it wears through in a season. Too much product, and it puddles and stays tacky.
| Factor | DIY | Professional |
|---|---|---|
| Upfront cost | Lower | Higher |
| Prep quality | Often rushed | Full strip and treat |
| Equipment | Basic sprayer | Commercial-grade sprayer + back-roll |
| Failure risk | High | Low |
| Time investment | A full weekend+ | Handled for you |
| Cost of a failed coat | Strip, re-prep, reseal, often more than the original professional quote | Covered by the contractor's workmanship |
The hidden cost of a DIY failure. A failed sealer isn't just a wasted weekend. Stripping a cured film-forming sealer requires a chemical stripper or a hot-water pressure wash, then re-prepping the surface, then resealing. That's the same job done twice, plus the stripper and disposal. For most driveways, the total cost of a failed DIY attempt exceeds the original professional quote, which is the real ROI argument, not the sticker price.
When DIY makes sense. Small, shaded patios with a penetrating sealer and a homeowner who's comfortable with a pressure washer and a sprayer can be a reasonable DIY project. Penetrating sealers are more forgiving of minor prep gaps because they don't form a film that can peel. Film-forming sealers on a large, sun-exposed driveway are where DIY goes wrong most often.
Troubleshooting a failed coat. If you're looking at a hazy, peeling, or tacky surface, the fix depends on the failure mode. Hazing usually means moisture was trapped or the coat was applied too thick, it needs a strip and reapply. Peeling at the edges means prep was skipped. Tacky after weeks means the product was applied outside its temperature range or over a contaminated surface. In every case, a spot patch won't hold; the film has to come off before anything new goes down. Catching it early, before the film fully cures, can save the strip step, which is why an annual inspection matters.
Paver Sealing Cost Per Square Foot in 2026: What Drives the Price
Paver sealing cost per square foot 2026 pricing depends on square footage, surface condition, sealer type, and prep work. There's no single number, and any quote that skips an on-site look is guessing.
What moves the price:
- Size: larger areas cost less per square foot but more overall
- Condition: heavy staining, efflorescence, or old failing sealer adds prep time
- Sealer type: penetrating versus film-forming, and finish choice
- Access: tight spaces and steep grades slow the crew down
- Timing: scheduling around weather and cure windows
For an accurate figure, request an on-site estimate. Steve's Premium Pressure Washing provides transparent upfront pricing with no hidden fees, so you know the number before work begins.
Environmental Impact, Maintenance Schedules, and ROI
Sealer choice affects more than appearance. Water-based sealers carry lower odor and easier cleanup, while solvent-based products often cure harder but need more ventilation (the EPA). Look for low-VOC options if runoff or indoor air quality is a concern.
A realistic maintenance schedule keeps the investment working:
| Timeframe | Task |
|---|---|
| Monthly | Sweep debris, rinse light dirt |
| Quarterly | Spot-clean stains, check joints |
| Annually | Inspect sealer, test water beading |
| Every 2-3 years | Full reseal as needed |
The ROI case is straightforward. Sealing extends paver longevity by preventing joint erosion, surface degradation, and stain damage. Replacing a failed hardscape costs far more than maintaining it, which is why preventative maintenance pays off over the life of the surface.
When a sealant does fail, the fix is usually a full strip and reapply rather than a spot patch. Catching problems early keeps that from happening.
Paver sealing protects your investment, but it only works when the surface is prepped and applied correctly. Steve's Premium Pressure Washing brings over 10 years of experience, soft wash technology that's safe for pavers and siding, and transparent upfront pricing with no hidden fees. As a woman-owned, family-run business rated 5 stars by customers, we handle everything from driveways to commercial exteriors. Get an estimate from Steve's Premium Pressure Washing and keep your hardscape looking sharp for years.
Frequently Asked Questions
How much should I pay to have my pavers sealed?
Pricing depends on square footage, paver condition, and the type of sealer used. Most professional paver sealing projects are quoted per square foot, with factors like surface preparation, joint sand replacement, and number of coats affecting the total. Request a detailed estimate from a licensed provider so you know exactly what is included. Avoid quotes that seem too low, as they often skip critical prep steps that affect how long the seal lasts.
Is there a downside to sealing pavers?
Sealing pavers is generally beneficial, but there are a few considerations. A film-forming sealer can trap moisture if applied to damp pavers, leading to efflorescence or mold proliferation underneath. Some sealers darken the surface or create a glossy wet look finish that not every homeowner wants. If the sealer is applied incorrectly, it can peel or discolor. Working with an experienced professional reduces these risks and ensures the right sealer type is matched to your pavers.
Does professional sealing prevent weed growth between pavers?
Professional sealing helps prevent weed growth by stabilizing joint sand and creating a hydrophobic barrier that reduces the moisture weeds need to sprout. Polymeric sand combined with a quality sealer locks the joints and blocks seed germination. While no method is 100% weed-proof, sealing significantly reduces how often weeds appear. It also makes any that do emerge easier to remove by hand, since the joint sand stays firm instead of washing away.
Can paver sealing improve the color of faded stone?
Yes. A color-enhancing sealer can restore depth and vibrancy to faded pavers, bringing back a look close to when they were first installed. The sealer deepens the natural tones and adds a uniform finish, whether you prefer a matte finish or a wet look finish. For severely faded or stained pavers, a professional may recommend cleaning and possibly a paver restoration treatment before sealing to get the best color results.