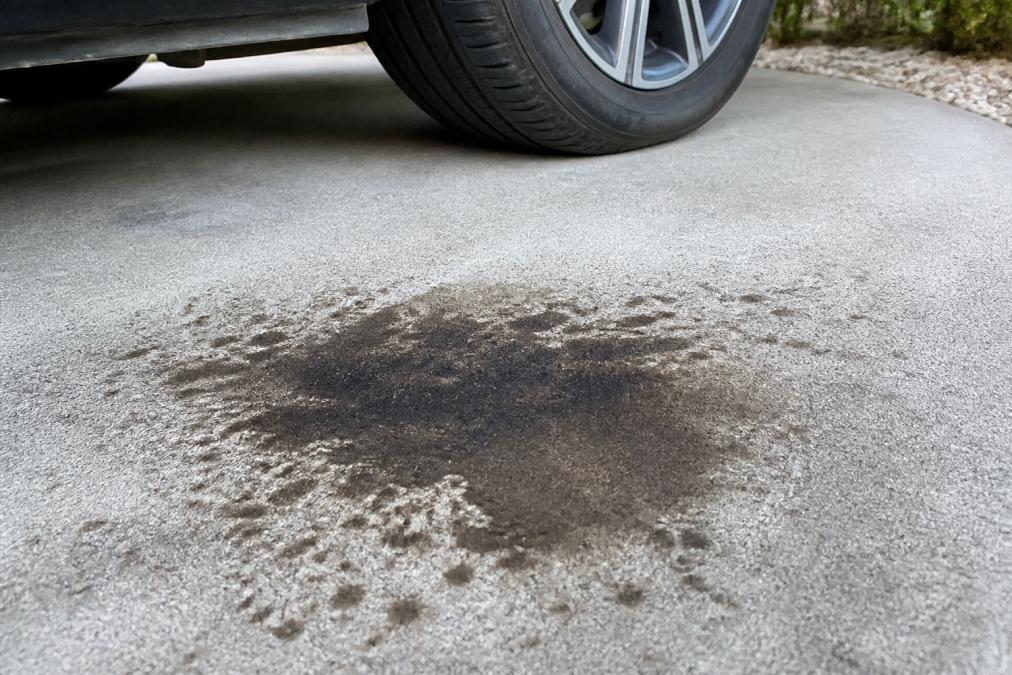
 how-to
How to Clean Driveway Oil Stains: A Step-by-Step Guide
Table of Contents
- Why Oil Stains Are Different on Concrete, Asphalt, and Pavers
- What You'll Need Before You Start
- Step 1: Blot Fresh Spills and Prep the Surface
- Step 2: Apply the Best Concrete Degreaser for Driveway Surfaces
- Step 3: Scrub, Rinse, and Manage Runoff Safely
- Step 4: How to Remove Rust Stains from Concrete Driveway
- Step 5: How to Prevent Oil Stains on Concrete in the Future
- When to Call a Professional vs. DIY
- Frequently Asked Questions
Last Updated: September 14, 2026
Why Oil Stains Are Different on Concrete, Asphalt, and Pavers
Driveway oil stains behave differently depending on your driveway material, and treating every surface the same risks a permanent mark or a damaged slab. Concrete is porous, so oil soaks in and binds to it. Asphalt is softer and sensitive to solvents, which can eat into the binder holding the aggregate together. Pavers sit in between, with sand joints that trap oil.
That difference matters because the same degreaser that rescues a concrete slab can dull or dissolve an asphalt surface. The EPA's guidance on safer cleaning products points out that many general-purpose cleaners contain solvents that are aggressive on certain materials, which is why matching the product to the surface is the first decision you make, not an afterthought.
The good news: fresh oil spills are far easier to lift than set-in stains, so speed beats strength almost every time.
What You'll Need Before You Start
Gather supplies before you start so you're not scrambling mid-job:
- Absorbent material: kitty litter, sawdust, or commercial absorbent pads
- A dedicated degreaser or surfactant-based cleaner matched to your surface
- A stiff bristle brush and a scrub brush for edges
- Safety goggles and chemical-resistant gloves
- A pressure washer or garden hose with a spray nozzle
- Baking soda for minor residue and odor
- A bucket, a scraper, and old rags you don't mind ruining
For concrete, a surfactant-based degreaser breaks the oil's surface tension so water can lift it. For asphalt, choose a gentler formula and skip harsh solvents. Pavers need a middle path, plus re-sanding the joints afterward.
Step 1: Blot Fresh Spills and Prep the Surface
Blot a fresh spill immediately, because oil that hasn't soaked in comes up by absorption rather than chemicals. Pour kitty litter or sawdust over the stain, let it sit several minutes, then sweep it up. Repeat until the absorbent stops darkening.
Once the bulk of the oil is gone, scrape off caked residue with a plastic scraper, then clear debris and loose dirt so your cleaner reaches the stain instead of a layer of grit. This prep matters for old stains too.
Absorbent Materials for Fresh Spills
Kitty litter is the workhorse because it's cheap and widely available. Sawdust works for lighter spills, and commercial pads handle larger puddles. The trick most people miss: press the absorbent into the spill with your foot or a board rather than sprinkling it on top, since pressure pulls more oil out.
For a spill that's already dried, move straight to the degreaser step. Absorption only helps while the oil is still liquid.
Step 2: Apply the Best Concrete Degreaser for Driveway Surfaces
The best concrete degreaser for driveway surfaces is a surfactant-based cleaner that breaks the bond between oil and concrete, applied undiluted and left to sit. Surfactants have a water-loving head and an oil-loving tail: the tail burrows into the oil, the head grabs water, and together they lift the oil so it rinses away.
That's why plain soap underperforms. Dish soap is a surfactant too, but it's formulated for grease on plates, not petroleum bound into a porous slab. A dedicated degreaser carries a higher surfactant concentration plus builders that keep loosened oil suspended.
Match the Cleaner to the Surface, Not the Stain
Most guides treat every driveway as concrete, the biggest mistake in this job, because the wrong cleaner can do more damage than the oil.
- Concrete: Porous and alkaline-tolerant. A surfactant-based concrete degreaser, an oxygen-bleach booster, or a citrus (d-limonene) cleaner all work, plus a stiff brush and moderate pressure.
- Asphalt: The binder is asphalt cement, which many solvents soften. Skip solvent-based products, avoid d-limonene at full strength, and use a gentle surfactant cleaner with low pressure. Work in the cool part of the day, since heat softens asphalt.
- Pavers: The paver is durable, but the sand joints are not. Use a surfactant cleaner applied with a pump sprayer so you control the volume, and plan to re-sand the joints afterward.
- Stamped or colored concrete: Color is often a surface stain or integral pigment. Acid-based and oxalic products can lighten it, so test a hidden corner first and prefer a pH-neutral degreaser.
- Gravel or exposed aggregate: You can't scrub a loose surface. Use an absorbent first, then a pump-sprayed degreaser, and accept that some staining will remain in the aggregate.
Eco-Friendly and Pet-Safe Alternatives That Actually Work
If you'd rather not use brake cleaner, oven cleaner, or a solvent-heavy degreaser near kids, pets, or a vegetable garden, you have real options. They work more slowly, but they work.
- Baking soda paste: Mix baking soda with water to a thick paste, spread it over the stain, and let it sit 30 minutes or more. It's mildly alkaline and abrasive, lifting light, fresh stains without harsh chemistry.
- Dish soap plus hot water: A few drops of grease-cutting dish soap in hot water, applied and left to dwell, handles fresh spills on sealed concrete. Rinse thoroughly to avoid a film.
- Citrus (d-limonene) cleaners: Plant-derived and effective on petroleum, but still solvents. Keep them off asphalt and test on colored concrete.
- Enzyme or microbial cleaners: These break oil down biologically over hours to days. They're the safest choice around plants and pets, and best for a stain you can leave overnight.
How Dwell Time and Agitation Affect Results
Dwell time, how long a cleaner sits before you rinse, is where most DIY jobs fail. People spray, scrub for ten seconds, and rinse, so the cleaner never gets a chance to work.
Give a degreaser several minutes of dwell time, then agitate with a stiff bristle brush, which works the cleaner into the pores and lifts loosened oil. For stubborn stains, apply, wait, scrub, and repeat rather than scrubbing harder once. If the product dries before you rinse, re-wet it, a dried degreaser stops working and can leave a residue ring.
Step 3: Scrub, Rinse, and Manage Runoff Safely
Scrub with firm, overlapping strokes, then rinse with a pressure washer or hose. Keep the nozzle moving at a consistent distance so you don't etch the surface or blast away joint sand.
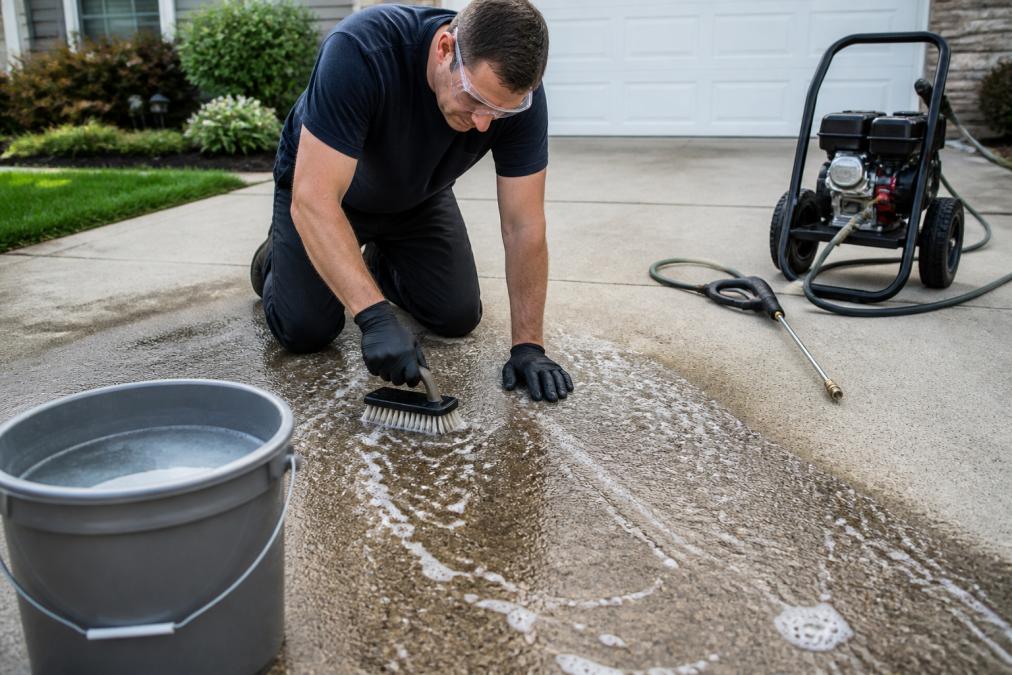
Runoff is the part most guides skip. Oil, degreaser, and dirty water shouldn't flow into storm drains, because many of those drains lead straight to waterways. The EPA's stormwater program explains that runoff carrying oil and chemicals is a leading source of water pollution. Contain what you can with a berm or absorbent sock, and dispose of the dirty water properly rather than hosing it into the street.
For a deep clean that skips the guesswork, Steve's Premium Pressure Washing uses soft wash technology and professional-grade equipment to lift stains.
Step 4: How to Remove Rust Stains from Concrete Driveway
To remove rust stains from concrete driveway surfaces, use an oxalic acid-based rust remover rather than a general degreaser, because rust is a mineral stain that oil cleaners won't touch. Rust comes from fertilizer, metal furniture, or a dripping vehicle, and bonds to concrete differently than oil.
Apply the rust remover, let it dwell per the label, then rinse thoroughly. Don't use bleach or a standard degreaser, since neither dissolves iron oxide. Test a small spot first, because acid-based products can lighten colored concrete.
For rust that's been sitting for years, a single application may not fully lift it. Repeat applications, spaced out, usually make more progress than one aggressive pass.
Step 5: How to Prevent Oil Stains on Concrete in the Future
To prevent oil stains on concrete in the future, seal the surface and catch drips before they soak in. A penetrating sealer fills the pores so oil sits on top instead of bonding, buying you time to blot it up. What most guides skip is how to tell whether a stain is cosmetic or a sign of a bigger problem, and what sealing costs.
Read the Stain Before You Seal Over It
A stain is information. Before you seal, look at what it's telling you.
- A dark, spreading halo around a stain often means oil has wicked outward through the slab, not just soaked straight down. Sealing over it traps the oil and the smell.
- A soft, crumbly, or spalling patch under or near the stain suggests oil has weakened the top layer, or water is now getting in through the same path. Sealer won't fix that; the surface needs repair first.
- A stain that reappears after cleaning usually means the oil reached deeper than surface cleaning can reach. Repeated reappearance signals the slab needs a penetrating sealer or poultice treatment, not another round of degreaser.
- A stain near a joint, crack, or the garage door threshold is worth watching. Oil that pools at a joint can migrate under the slab and show up elsewhere.
If you see soft concrete, a widening crack, or a stain that keeps returning after two or three cleaning attempts, treat it as a repair question, not a cleaning question.
Sealing: What It Costs You in Time and Money
A penetrating silane or siloxane sealer is right for a driveway because it soaks in and leaves the surface breathable. A film-forming sealer sits on top and can peel, chalk, or turn slippery when wet, a real hazard on a sloped drive.
- DIY cost: A one-gallon jug of penetrating sealer typically covers a few hundred square feet and costs about what a mid-grade paint project would. A two-car driveway usually takes one to two gallons and an afternoon.
- DIY time: Plan a full day for prep, cleaning, drying, and two coats, plus a dry window of at least 24 to 48 hours with no rain.
- Professional cost: A pro job bundles cleaning and sealing and is priced by square footage, so it scales with the drive. For a large or heavily stained driveway, labor savings often outweigh the material cost.
- Reapplication: A penetrating sealer typically needs refreshing every few years, sooner in high-traffic or freeze-thaw climates. Test by dripping water on the surface, if it soaks in instead of beading, it's time to reseal.
Habits That Actually Reduce Stains
- Park over a drip pan if your vehicle leaks, and empty it before it overflows.
- Fix small leaks, valve cover gaskets, oil pan gaskets, and drain plugs are common culprits, before they become recurring stains.
- Keep an absorbent like kitty litter or a commercial pad in the garage so a fresh spill gets blotted in the first few minutes, when it's easiest to lift.
- Put a mat or drip tray under lawn equipment, generators, and anything else that stores oil.
- Reapply sealer on schedule rather than waiting for stains to reappear.
Sealing is the single highest-value step. It also makes regular cleaning easier, because dirt and oil release more readily from a sealed surface. If you'd rather not handle sealing and cleaning yourself, Steve's Premium Pressure Washing offers personalized service tailored to your property's needs.
When to Call a Professional vs. DIY
Call a professional when the stain is large, set-in, or on a surface you're worried about damaging. DIY works for fresh spills and routine maintenance, but a few situations tip the balance:
| Situation | DIY Approach | When to Call a Pro |
|---|---|---|
| Fresh spill, small area | Blot and degrease | Rarely needed |
| Set-in stain, years old | Repeat degreaser passes | Stubborn or spreading stains |
| Asphalt or pavers | Gentle cleaner, low pressure | Risk of surface damage |
| Rust or mineral stains | Oxalic acid remover | Stain won't lift after retries |
| Large driveway, multiple stains | Time-intensive | Faster with pro equipment |
The real difference is equipment and risk. A homeowner with a garden hose and brush can handle most fresh stains. Older, larger, or more delicate jobs are where professional equipment and experience pay off, and where a wrong move can mean a scarred slab.
Steve's Premium Pressure Washing has more than a decade of experience and a five-star reputation built on attention to detail. As a local, family-owned business, we offer transparent upfront pricing with no hidden fees and flexible scheduling, so you know exactly what to expect. From driveways and patios to building exteriors, our team restores curb appeal with safe deep cleaning methods.
Frequently Asked Questions
How do I get dried oil stains off my driveway?
Dried oil stains need more dwell time than fresh ones. Apply a concrete degreaser, let it sit for 10-15 minutes, then agitate with a stiff bristle brush. For set-in stains, repeat the process or use a poultice made from baking soda and water. Pressure washing after treatment helps lift remaining residue. If the stain has been there for years, a professional may need to use specialized equipment.
Does Dawn dish soap remove oil from concrete?
Dawn and similar dish soaps can break down light, fresh oil stains because they contain surfactants. However, they are not formulated for porous surfaces like concrete. For older or deeper stains, a dedicated concrete degreaser works better. Dish soap is a reasonable first step for small spills, but it may not fully remove set-in stains or prevent them from returning.
How long should I let degreaser sit on a concrete driveway?
Most concrete degreasers need 5-15 minutes of dwell time to break down oil. Check the product label for specific instructions. In hot weather, keep the surface wet so the degreaser does not dry out before it works. If the stain is deep, you may need to apply, dwell, and scrub two or three times. Avoid letting any cleaner dry on the surface.
Are driveway oil stains permanent?
Most oil stains are not permanent, but they can leave a shadow if they have soaked deep into the concrete. Fresh stains respond well to absorbents and degreasers. Older stains may need multiple treatments or professional cleaning. Sealing your driveway after cleaning helps prevent future stains from penetrating and makes them easier to remove.
A driveway full of oil stains drags down the look of your whole property, and the wrong method can leave a permanent mark or damage the surface. Steve's Premium Pressure Washing brings professional-grade equipment, soft wash technology, and personalized service to every job, with transparent pricing and no hidden fees. Get started with Steve's Premium Pressure Washing and restore your driveway's curb appeal with a clean you can see from the street.