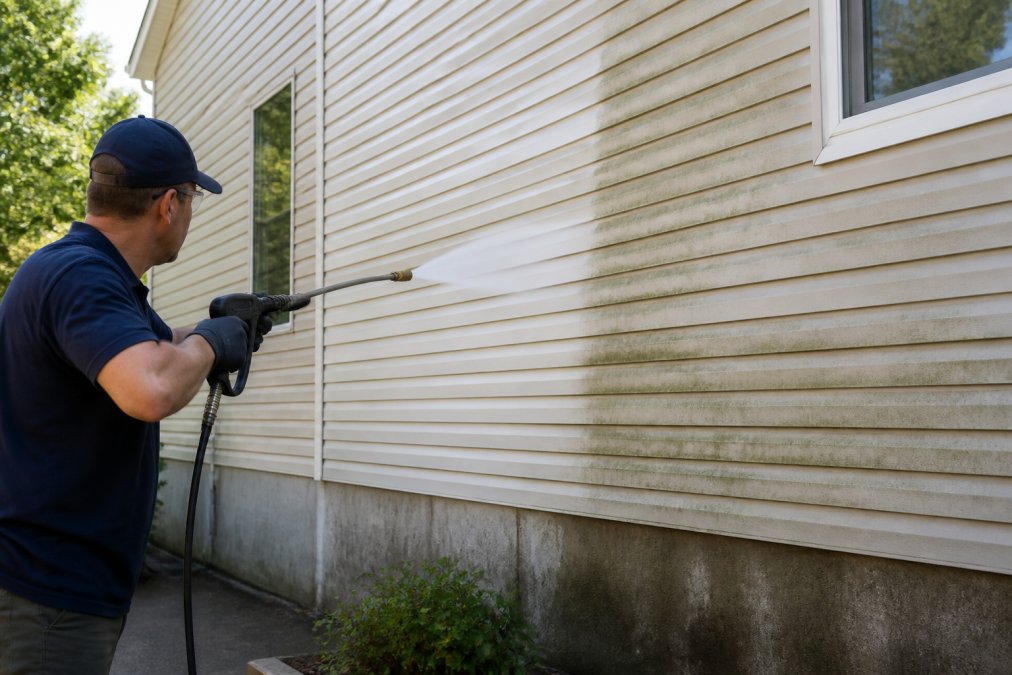
 how-to
Safe Pressure Washing for House Siding: A 2026 How-To
Table of Contents
- What You'll Need Before You Start
- Match PSI to Your Siding Material
- Soft Washing vs Pressure Washing: Which Your Siding Needs
- Safe Cleaning Solutions for House Siding
- Step-by-Step: Pressure Washing Your Siding Safely
- How to Prevent Water Intrusion Behind Siding
- Post-Cleaning Inspection Checklist
- Frequently Asked Questions
Last Updated: September 10, 2026
What You'll Need Before You Start
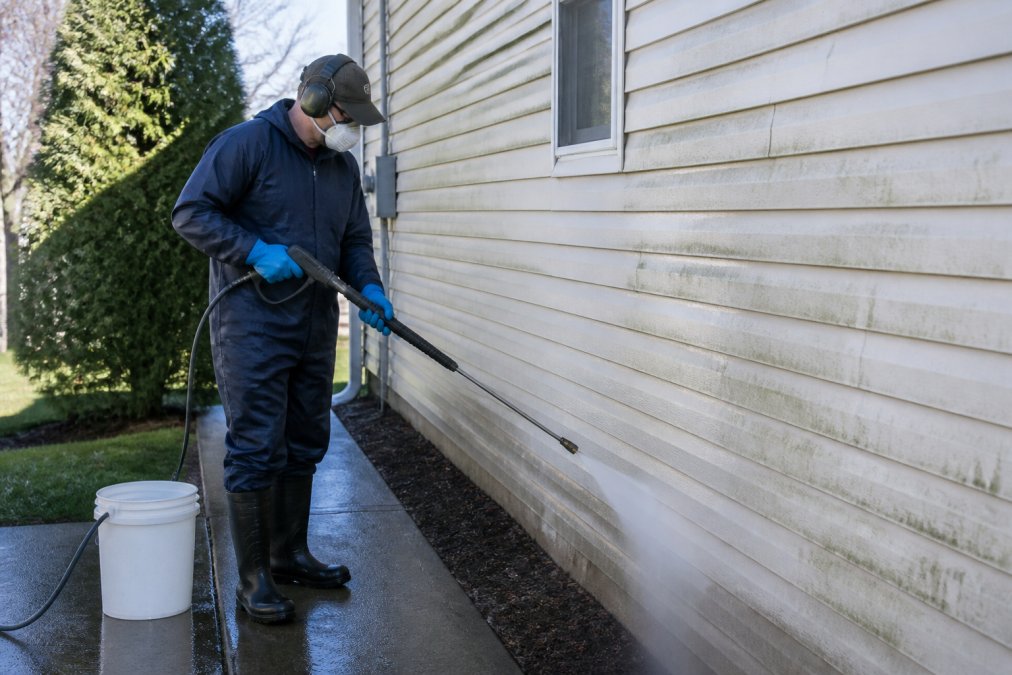
Safe pressure washing for house siding starts with the right gear, not the biggest machine. Most damage happens when homeowners grab a gas unit built for concrete and aim it at vinyl or fiber cement. Gather these:
- Electric pressure washer rated 1,200-1,800 PSI with adjustable pressure regulation
- Nozzle tips in 25-degree and 40-degree fan spray patterns (skip the 0-degree red tip entirely)
- Detergent tank or a pump sprayer for cleaning solution
- Protective gear: safety glasses, gloves, and non-slip shoes
- Extension wand (pole-mounted) to reach second-story siding without a ladder
- Plastic sheeting and painter's tape to cover outlets, light fixtures, and AC units
A common mistake is renting a gas-powered commercial unit "to do it right." A 4,000 PSI gas unit will strip paint or crack panels before you finish one wall; siding needs low pressure and the right technique.
Match PSI to Your Siding Material
The safest pressure setting for house siding is the lowest one that still removes dirt, and that number changes with material. Getting it wrong is the single biggest cause of costly damage.
| Siding Material | Recommended PSI | Nozzle Tip | Key Risk |
|---|---|---|---|
| Vinyl | 1,200-1,500 | 40-degree | Cracking, water behind panels |
| Wood | 500-1,000 | 25-40 degree | Raising the grain, stripping stain |
| Fiber cement | 1,200-1,500 | 25-degree | Chipping edges, forcing water in |
| Stucco | 1,200-1,500 | 25-degree | Cracking, sub-surface moisture |
| Painted surfaces | Under 1,200 | 40-degree | Peeling paint, bare spots |
Best PSI for Vinyl Siding
The best PSI for vinyl siding is 1,200 to 1,500. Anything above that risks cracking panels and forcing water behind the wall. Vinyl gets brittle with age, so older siding needs the gentler end of that range. Keep the wand moving and never hold it in one spot.
Wood, Fiber Cement, and Stucco Pressure Limits
Wood is the most forgiving on pressure but the least forgiving on technique: stay at 500-1,000 PSI and angle the stream down to avoid raising the grain. Fiber cement and stucco sit around 1,200-1,500 PSI, but the real danger is water intrusion at seams and cracks, so seal any gaps before you start.
Soft Washing vs Pressure Washing: Which Your Siding Needs
Soft washing uses low pressure plus cleaning solution to kill mildew and algae at the root; pressure washing relies on water force alone. For siding, soft washing is usually safer because it cleans without the mechanical stress that cracks panels and drives water into walls. The practical question is how to actually soft wash siding.
The Mechanism: Why Chemistry Beats Force on Siding
Mildew, algae, and lichen anchor to siding with root-like structures. A pressure stream knocks off the visible layer but leaves the roots behind, which is why growth returns within weeks in humid regions. A soft wash applies a solution that penetrates the growth, breaks the organism down, and lets a gentle rinse carry it away. The detergent does the work; the water just transports it.
Pressure Washing vs Soft Washing: Side-by-Side
| Factor | Pressure Washing | Soft Washing |
|---|---|---|
| Pressure at the surface | 1,200-4,000 PSI | 100-500 PSI |
| Primary cleaning agent | Water force | Cleaning solution |
| Typical nozzle | 0-25 degree | 40 degree or downstream injector |
| Best for | Concrete, brick, pavers | Vinyl, fiber cement, stucco, painted wood |
| Risk to siding | Cracking, water intrusion, paint loss | Low, when diluted and rinsed correctly |
| Mildew regrowth | Fast, roots survive | Slow, growth is killed |
The Soft Wash Setup
You do not need a dedicated soft wash rig. A standard electric pressure washer with a downstream injector pulls cleaning solution into the stream after the pump, dropping nozzle pressure to a safe range for siding. The key components:
- Downstream injector rated for your machine's gallons per minute, installed between the pump and the hose
- 40-degree nozzle or a soft-wash tip to widen the spray further
- Detergent pickup tube dropped into a bucket of diluted solution
- Pump sprayer as a backup for small sections or for applying solution before rinsing
A downstream injector dilutes solution as it draws it, so the bucket mix is stronger than what reaches the wall. Follow the injector's draw ratio.
Dilution and Dwell Time
Dilution depends on the product, so the label always wins. A common pattern for siding is a sodium hypochlorite mix cut to roughly 1 to 1.5 percent available chlorine for vinyl and fiber cement, with a surfactant to help it cling to vertical surfaces (extension.uga.edu). Painted wood and older vinyl call for a gentler mix. Apply bottom-up so it does not streak, let it dwell per the label, and do not let it dry on the surface. Rinse top-down at low pressure before moving on.
When Pressure Washing Still Wins
Soft washing is the default for siding, but true pressure washing has a place. Concrete driveways, brick, and pavers tolerate higher pressure and often need it to lift embedded grime. Rule of thumb: if the surface is porous, painted, or has seams water can enter, soft wash it. If it is solid masonry with no paint to lose, pressure washing is fair game.
Safe Cleaning Solutions for House Siding
Safe cleaning solutions for house siding are mild, surface-appropriate, and rinsed thoroughly. Oxygen bleach and water handles most mildew and algae on vinyl and fiber cement. Avoid chlorine bleach on painted wood and never mix bleach with ammonia-based products.
Match the solution to the surface:
- Vinyl and fiber cement: oxygen bleach or a siding-specific detergent, diluted per label
- Painted wood: mild dish soap and water, or a wood-safe cleaner
- Stucco: oxygen bleach, applied low and rinsed fast
- Mildew and algae: a dedicated mildew removal product with a detergent injection setup
Runoff carries detergent into soil and storm drains, so choose biodegradable formulas, apply only what the surface needs, and don't let solution pool on grass or plants. Rinse nearby landscaping before and after.
Step-by-Step: Pressure Washing Your Siding Safely
Safe pressure washing for house siding follows one rule above all: work top-down, keep pressure low, and never let water sit behind a panel. The process below applies to soft washing and low-pressure washing alike.
Step 1: Prep the Area and Protect Weep Holes
Close windows and doors, cover outlets and fixtures, and move furniture away from the wall. Critically, protect the weep holes, the small gaps at the bottom of siding panels that let moisture escape. Tape over them or angle your spray away. If water gets behind the siding and can't drain, you get rot, mold, and sub-surface moisture that shows up months later.
Step 2: Apply Detergent and Let It Dwell
Apply cleaning solution bottom-up so it doesn't streak, then let it dwell for the time the label specifies. Dwell time is what kills mildew and loosens grime. Don't let it dry; if it starts to, mist it lightly. Work in sections.
Step 3: Rinse Top-Down With a Fan Spray
Rinse top-down with a 25- or 40-degree fan spray, holding the wand at a downward angle about two feet from the wall. Overlap each pass, keep the stream moving, and never direct it upward into seams, which is how water intrusion starts. Re-treat stubborn spots rather than blasting harder.
How to Prevent Water Intrusion Behind Siding
Water intrusion turns a weekend cleaning job into a repair bill. It happens when high pressure forces water past seams, around windows, and through weep holes that can't drain. Preventing it comes down to technique, but knowing what to do if it happens is the part most guides skip.
Prevention: The Three Habits That Matter
First, always angle the spray downward, never straight into a joint. Second, keep pressure low enough that water can't overcome gravity and panel overlap. Third, inspect caulk lines, window trim, and utility penetrations and reseal anything failing. Fourth, keep the wand at least two feet from the wall and keep it moving. Distance and motion prevent intrusion better than any single setting.
How Water Actually Gets Behind Siding
Siding is a rain screen, not a seal: it sheds most water while letting the small amount that gets past drain through weep holes at the bottom of each panel (buildingscience.com). Water intrusion during washing happens through four paths:
- Upward spray into horizontal seams, where panel overlap only sheds water moving down
- Weep holes, which are drains, not targets, and should never be sprayed directly
- Failed caulk and trim joints around windows, doors, and utility penetrations
- Cracked or warped panels that no longer overlap correctly
Understanding the drain path matters because it tells you where to look after a wash.
Diagnostic: Signs Water Got Behind the Panels
Symptoms often appear days to weeks after cleaning. Walk the interior of exterior walls and check for:
- Bubbling, blistering, or peeling paint on the interior side
- Soft or spongy drywall near the baseboard
- A musty or damp smell in the room
- Staining or discoloration on the interior wall or ceiling below a window
- Siding that feels loose or sounds hollow when tapped
On the exterior, look for water streaks running down from a seam, caulk that has pulled away, or weep holes that appear blocked with paint or debris.
Severity Tiers and What to Do
Not every intrusion is a crisis. Match your response to what you find:
| Severity | What You See | Action |
|---|---|---|
| Minor | One damp spot, no smell, dries within a day | Increase airflow, monitor for a week |
| Moderate | Persistent dampness, musty smell, small paint bubbles | Open the wall cavity at the baseboard, run a fan or dehumidifier, inspect sheathing |
| Severe | Soft drywall, visible mold, warped sheathing | Stop using the area, call a qualified contractor to assess the wall assembly |
For minor cases, a box fan and dehumidifier running several days often resolve it. For moderate cases, get air moving inside the wall, usually by removing a section of interior finish or exterior siding to create a drying path. For severe cases, the sheathing or framing may be compromised, call a licensed professional.
Resealing After the Wall Dries
Do not reseal until the wall is fully dry, trapping moisture behind fresh caulk guarantees rot. Once dry, replace failed caulk with a paintable exterior sealant rated for your siding material, clear blocked weep holes, and re-check joints around windows and utility penetrations. Wait through one rain cycle before closing the repair.
Post-Cleaning Inspection Checklist
A post-cleaning inspection catches problems while they're cheap to fix. Walk the perimeter and check each item before you pack up.
- No cracked, warped, or loose siding panels
- Paint intact, no peeling or blistering
- Weep holes clear and draining
- Caulk lines and window trim still sealed
- No water streaks or missed mildew patches
- Landscaping rinsed and undamaged
- No standing water pooled at the foundation
Address anything off now, a cracked panel or failed seal only gets worse with the next rain.
Cleaning siding safely takes the right pressure, the right solution, and a technique that respects how siding is built. Get any of those wrong and you trade curb appeal for repairs. Cleaning siding safely takes the right pressure, the right solution, and a technique that respects how siding is built. Get any of those wrong and you trade curb appeal for repairs. Steve's Premium Pressure Washing provides expert residential and commercial exterior cleaning services designed to restore your property's curb appeal. As a woman-owned, family-run business with 10+ years of experience and 5-star reviews, we are committed to providing transparent, personalized service and a stress-free experience for every client. Get your estimate from Steve's Premium Pressure Washing and restore your home's curb appeal the safe way.
Frequently Asked Questions
Is it safe to pressure wash house siding?
It depends on the material and technique. Vinyl, fiber cement, and stucco can handle pressure washing when you use the right PSI and a wide fan spray. Wood siding needs lower pressure and more distance. The safest approach is soft washing, which uses low pressure and cleaning solutions to remove mildew and algae without forcing water behind the panels.
What PSI is safe for vinyl siding?
Keep your pressure washer under 1,500 PSI for vinyl siding, and stay below 1,300 PSI if the siding is older or shows signs of brittleness. Use a 25-degree or 40-degree nozzle tip and hold the wand at least 12 inches from the surface. Higher pressure can crack panels, force water behind the siding, and strip the finish.
Can pressure washing cause water to get behind siding?
Yes, if you spray upward at an angle or use too much pressure near seams and weep holes. Water forced behind panels can soak the house wrap, insulation, and framing, leading to mold growth and sub-surface moisture problems. Always spray downward, keep the nozzle moving, and avoid directing the stream at weep holes, vents, or gaps between panels.
What is the best cleaning solution for pressure washing siding?
A mix of sodium hypochlorite (household bleach) and water at roughly a 1:3 ratio works well for mildew and algae on most siding types. Add a small amount of surfactant or dish soap to help the solution cling to vertical surfaces. For wood siding, use an oxygen bleach-based cleaner instead of chlorine to avoid damaging the wood fibers.